When planning social media campaigns, it’s important to keep your content organized so you can track results, understand what did or didn’t work, and easily access your top-performing content in the future.
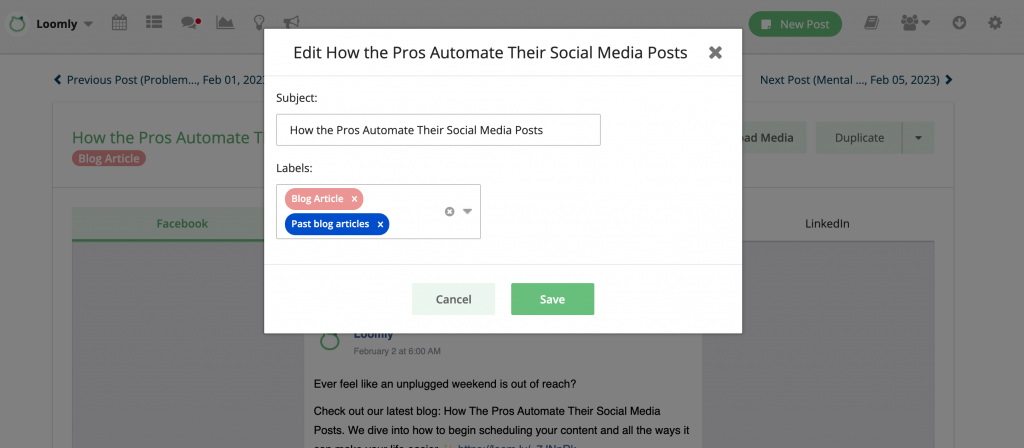
While social media managers have long had the ability to track social media marketing campaigns with Loomly using our labels feature, we’ve enhanced the experience by allowing you to edit labels and your internal post “subject” once a post has been published for easy reference.
You can also manage subjects and labels in Loomly’s mobile app!
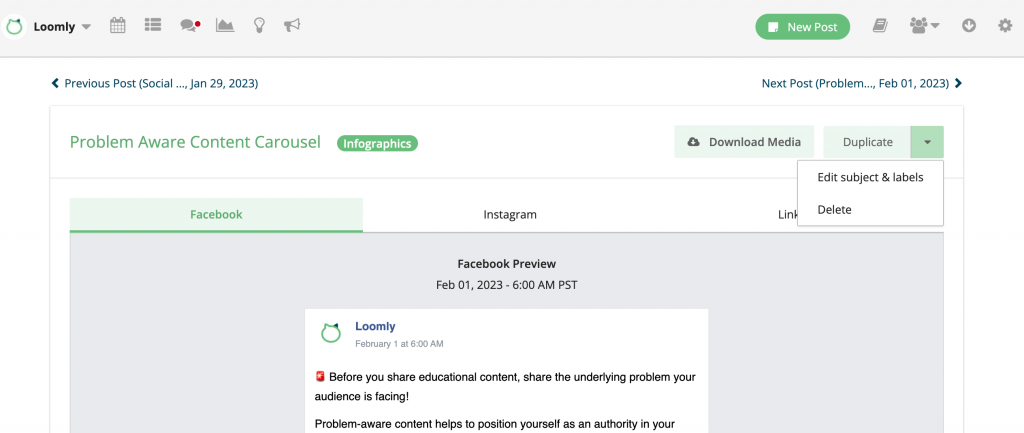
This flexibility comes in handy when you forgot to add a label when originally drafting the post, or if you decide to add your content to an upcoming campaign.
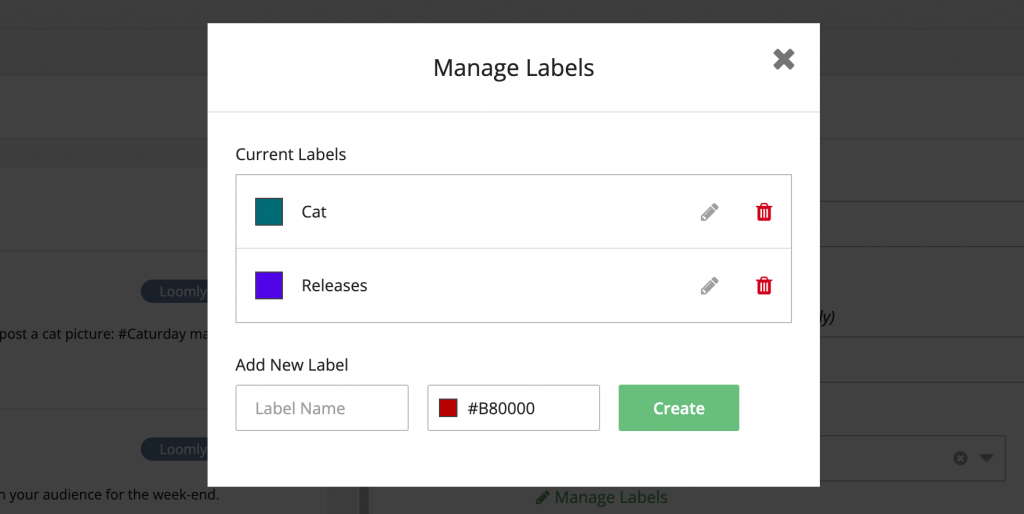
You can create as many labels as you need and associate them with a specific color for easy identification:
Read on to learn the full power of how to manage campaigns using Loomly from ideation to reporting on your wins!
Highlights of using labels to track social media campaigns
Labels are a fantastic way to:
- Keep your content organized and easy to find in your Content Library
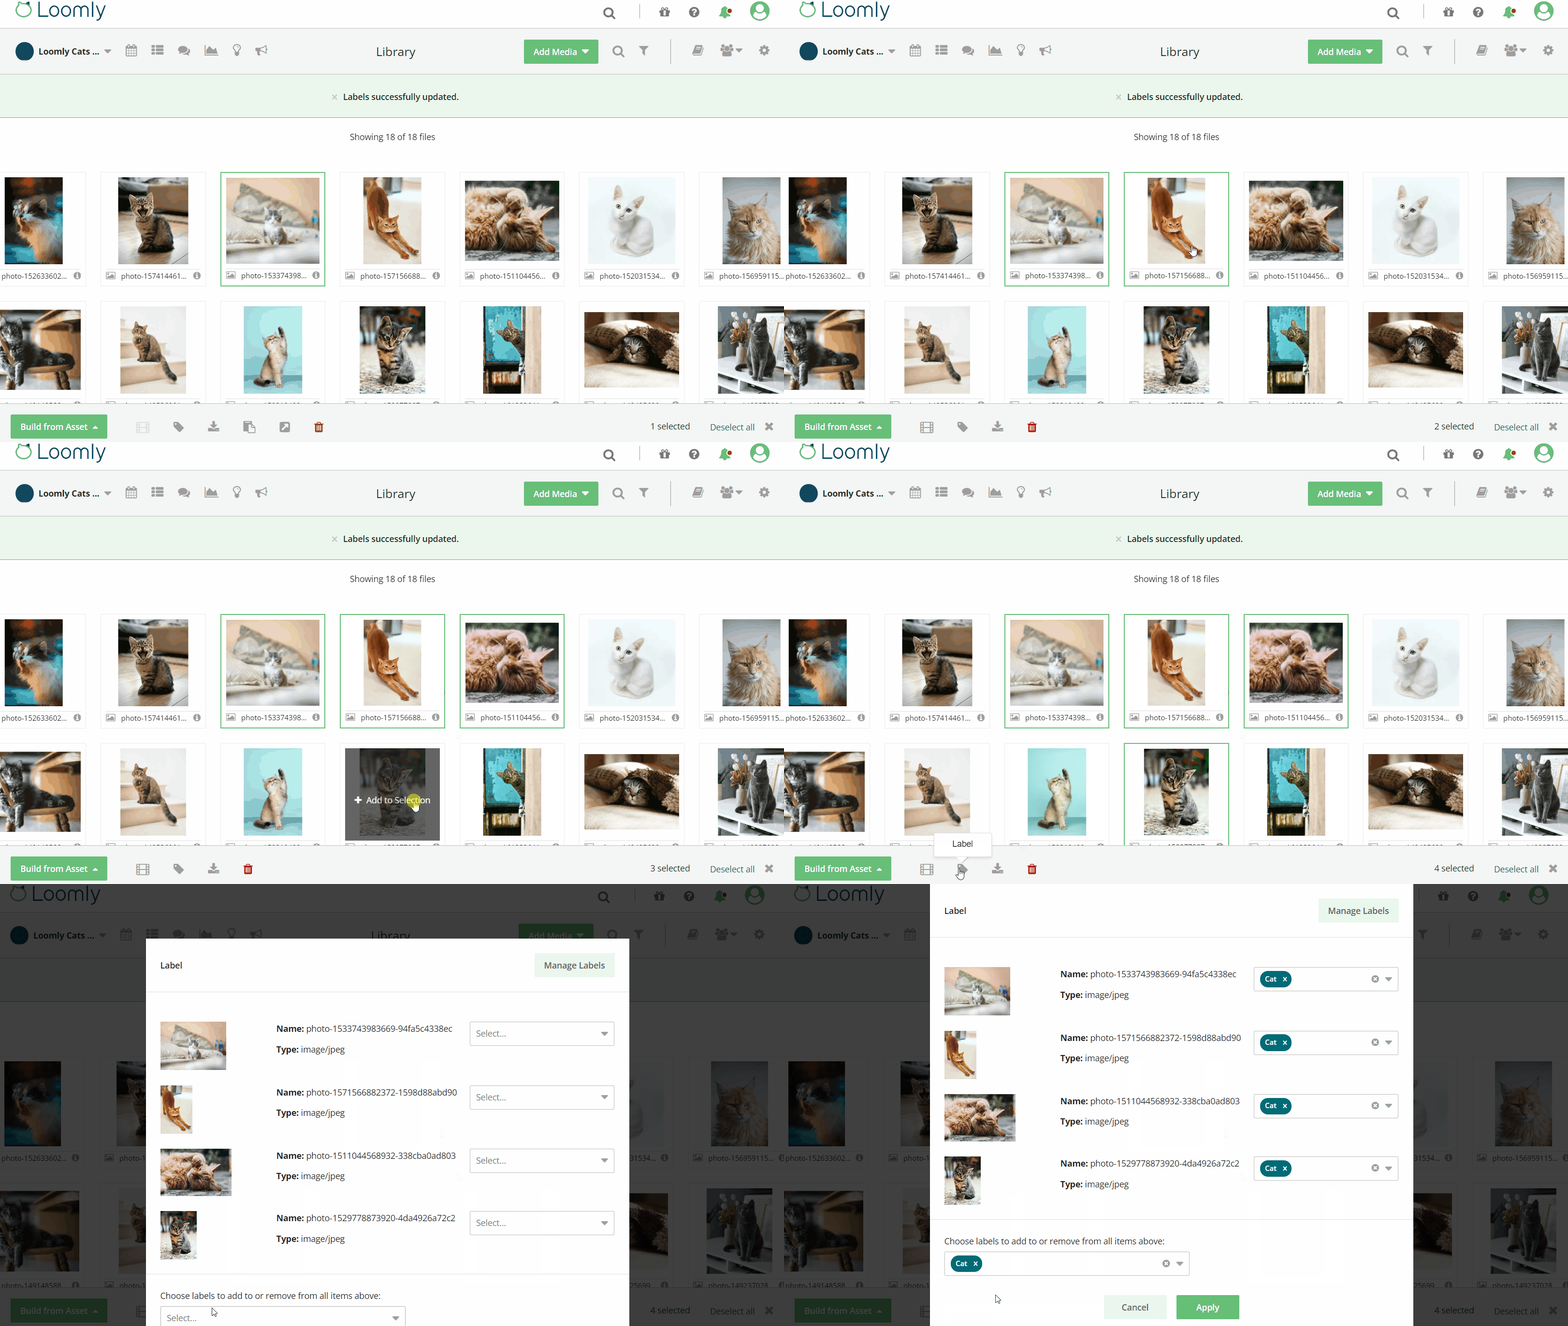
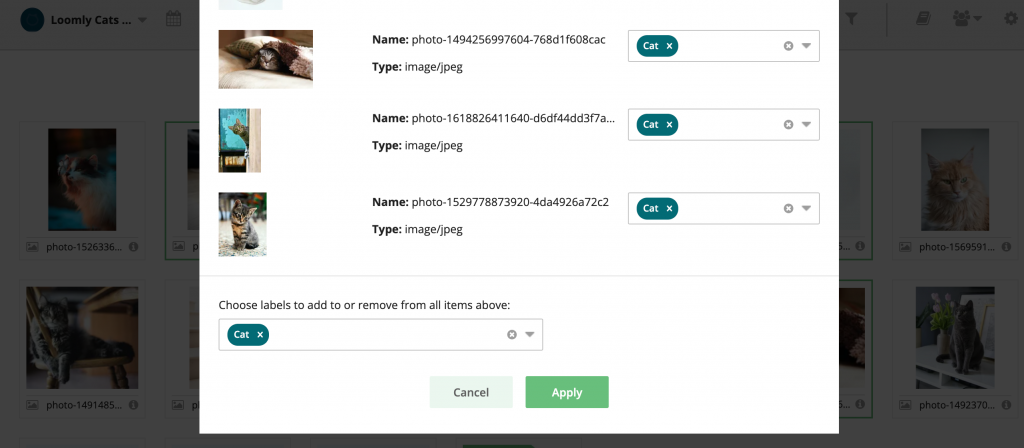
When planning your visual assets, drafting copy, or even creating videos from a slideshow of images, using labels in your Content Library lets you easily filter by content type and the associated campaign.
You can add labels in bulk so save even more time:
- View the cadence of campaign posts in the Calendar or List View
As you build out a campaign, it can help to visualize the flow of the posts, the imagery, and how everything connects.
Filtering posts by the campaign label allows you to easily see where to move posts and if more content is needed.
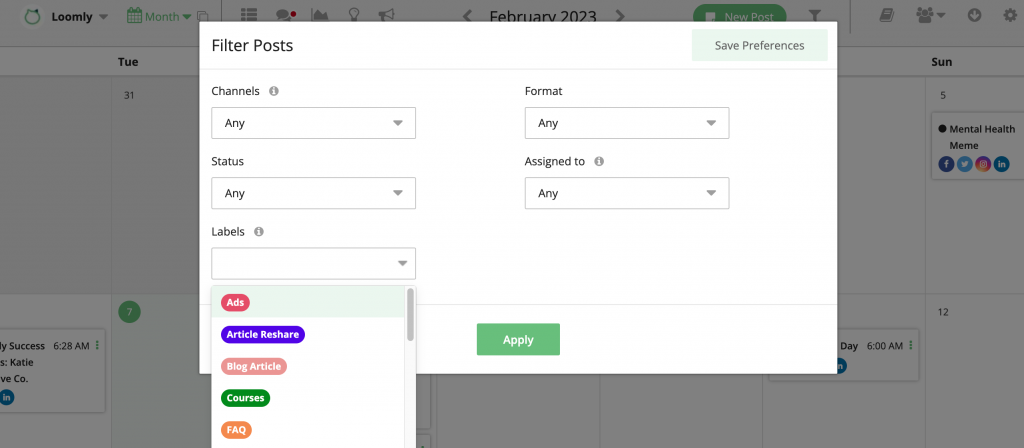
- Track and report on your content campaigns with Advanced Analytics
Labels let you track all of your campaigns so you can see social media channel-specific engagement including Clicks, Retweets, Likes, Shares, Impressions, and more. You can quickly learn how each of your campaigns are performing, what needs adjustment, and where to double down on your content.
How to add labels to social media posts and content in Loomly
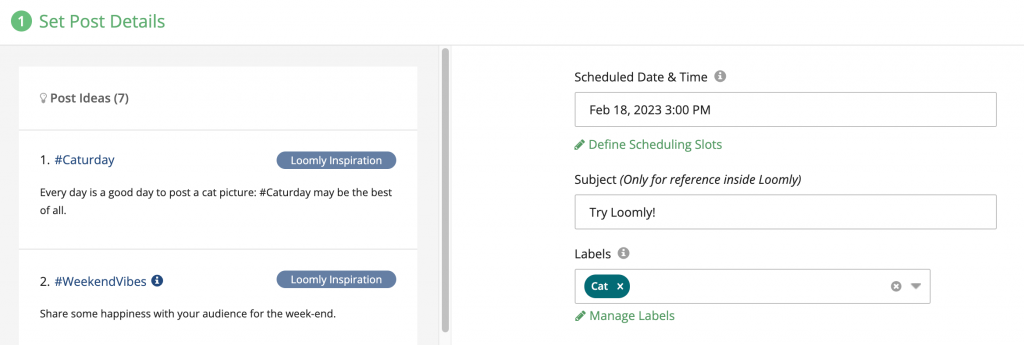
There are a few ways to add labels to posts and content in Loomly. The first is in the Post Builder on the first step:
The second is in the Content Library where you can add labels one-off or in bulk:
And the third is after a post has been published, where you can and edit or add new labels:
Want to learn more?
Manage all your social media campaigns in one place with Loomly. Start your 15-day free trial today!
Check out this support article for more information on managing labels and all you can do with drafting content campaigns in Loomly.
If you have any further questions, please don’t hesitate to reach out to us here.

